접근지정자
#include <iostream>

class Animal {
private: //접근 지시자 (기본값이 private)
    int food;
    int weight;

public:
//외부에서 접근 가능 (main함수에서 이 함수들을 불러서 쓸 수 있음)
    void set_animal(int _food, int _weight) {
        food = _food;
        weight = _weight;
    }
    void increase_food(int inc) {
        food += inc;
        weight += (inc / 3);
    }
    void view_stat() {
        std::cout << "이 동물의 food :  " << food << std::endl;
        std::cout << "이 동물의 weight : " << weight << std::endl;
    }
};

int main() {
    Animal animal;
    animal.set_animal(100, 50);
    animal.increase_food(30);
    // ainmal.food = 100; 💥

    animal.view_stat();
    return 0;
}
💥food는 접근 지정자가 private으로 외부에서 접근할 수 없다. 즉, animal.food = 100;으로 변수를 직접 변경할 수가 없기 때문에 캡슐화를 쓴다!
함수를 통해 변수값 변경 animal.set_animal(100,30); 하면 food, weight가 100, 30으로 변경됨
food, weight를 main에서 접근하면 오류가 남(해당 변수가 private이기 때문, public이면 animal.food=100; 가능)
인스턴스 개념 정리:
- 인스턴스 변수 : 우리가 알고 있는 일반 변수
- 인스턴스 함수 : 우리가 알고있는 일반 함수
- 멤버 변수 : 클래스 안에 있는 변수를 지칭
- 멤버 함수 : 클래스에서 만들어진 함
⇒ 클래스를 사용하기 전까지는 실재하는 것이 아님(멤버 변수, 멤버함수 ) (즉, 메모리 차지 X)
연습문제

#include <iostream>

class Date {
    int year_;
    int month_;  // 1 부터 12 까지.
    int day_;    // 1 부터 31 까지.

public:
    void SetDate(int year, int month, int date) {
        year_ = year;
        month_ = month;
        day_ = date;
    }
    void AddDay(int inc) {
        day_ += inc;
        if (month_ == 2 && day_ > 28) { day_ -= 28; month_ += 1; }
        else if (month_ == 1,3,5,7,8,12) {
            day_ -= 31; month_ += 1;
            if (month_ > 12) { month_ -= 12; year_ += 1; }
        }
        else if (month_ == 4, 6, 9, 10, 11) {
            day_ -= 30; month_ += 1;
        }
    }
    void AddMonth(int inc) {
        month_ += inc;
        if (month_ > 12) { month_ -= 12; year_ += 1; }
    }
    void AddYear(int inc) {
        year_ += inc;
    }

    void ShowDate() {
        std::cout << year_ << "년 " << month_ << "월 " << day_ << "일" << std::endl;
    }
};

int main() {
    Date date;
    date.SetDate(2022, 12, 31);
    date.AddDay(3);

    date.ShowDate();

    return 0;
}
생성자
class Marine{
public:
    Marine();        // 기본 생성자
    Marine(int x, int y);  // 매개변수가 있는 생성자
private:
    int coord_x, coord_y;
};

// 기본 생성자 정의
Marine::Marine() {
    hp = 50;
    coord_x, coord_y = 0;
    damage = 5;
    is_dead = false;
}

// 매개변수가 있는 생성자 정의
void Marine::move(int x, int y) {
    coord_x = x;
    coord_y = y;
}
int main() {
Marine* marines[100];
marines[0] = new Marine(2, 3);
marines[1] = new Marine(3, 5);
marines[0]->show_status(); //객체 포인터로 멤버 함수를 호출
marines[1]->show_status();
std::cout << std::endl << "마린 1 이 마린 2 를 공격! " << std::endl;
marines[0]->be_attacked(marines[1]->attack());
marines[0]->show_status();
marines[1]->show_status();
delete marines[0];
delete marines[1];
}- marines[0] = new Marine(2, 3); 동적으로 클래스 객체 생성 (동적으로 생성하면 반드시 삭제(delete)를 해줘야 함 ⇒ 메모리 누수 방지)
- 객체를 생성함과 동시에 인자로 값을 전달하고 있음
- 이렇게 선언하는 이유 : marine은 1,2,3 ~~ 무수히 생성될 수 있는 객체인데 그때마다 marine1 ; marine2; 하면 1. 이름 붙이기 힘듦 2. 개수가 정해져 있지 않기 때문에 몇 개를 만들어놔야 할지 모름
- ⇒ 이때 배열을 사용 (이름 지정 문제 해결, 동적할당으로 개수 지정 문제 해결)
- 그렇다면 원래 클래스 생성 방법은?
- class Marine(int x, int y) { ~~~ } int main() { Marine marine(2, 3); //객체 선언, 초기 }
- marines[0]->show_status(); : 객체 포인터로 멤버 함수를 호출
- 배열의 [0]에 들어있는 포인터, 그 포인터가 가리키는 marines객체의 show_status() 함수 호출 ⇒ marines배열 0 인덱스에 있는 애(=Marine(2,3)의 값을 가지는 marine)의 상태를 보여주는 함수
소멸자
: 생성자랑 동일하게 생김 앞에 ~ 붙이면 끝!
class Marine{
    Marine(); //기본 생성자
    ~Marine(); //소멸자
}
소멸자도 생성자와 마찬가지로 자동으로 생성됨
그러나
Marine::Marine(int x, int y, const char* marine_name) {
  name = new char[strlen(marine_name) + 1];
  strcpy(name, marine_name);
}
이렇게 생성자에 new 동적할당을 해주었을 경우 delete는 어디에서 이루어지나? —> 이럴 때 소멸자를 사용
Marine::~Marine() {
  std::cout << name << " 의 소멸자 호출 ! " << std::endl;
  if (name != NULL) {
    delete[] name;
  }
소멸자를 이용하여 delete 메모리 삭제해 주기
⇒ 소멸자가 필요 없는 클래스라면 굳이 써줄 필요 X
정리 . .
// 생성자, 소멸자 호출 확인하기
#include <string.h>
#include <iostream>
class Test {
char c;
public:
Test(char _c) {
c = _c;
std::cout << "생성자 호출 " << c << std::endl;
}
~Test() { std::cout << "소멸자 호출 " << c << std::endl; }
};
void simple_function() { Test b('b'); }
int main() {
Test a('a');
simple_function();
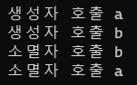
}출력 >>
코드 분석 >>
- Test a('a'); 실행 : 매개변수 char를 a로 받음 >> 생성자 호출 a
- simple_function(); 실행 → Test b('b'); 실행 : char를 b로 받음 >> 생성자 호출 b
- 함수 실행이 끝났으므로 소멸시키기
- simple_function(); 소멸 → Test b('b'); 소멸 >> 소멸자 호출 b
- Test a('a'); 소멸 >> 소멸자 호출 a
이런 형태로 진행 : Test a(’a) { simple_function() { Test b(’b’) } }
🤔❓
- 생성자는 자동으로 생성되는 데 왜 생성자를 입력하는 걸까?
- 포인터 메모리 할당
- 위에서 말한 new, delete를 할당하고 삭제하기 위해선 생성자와 소멸자를 작성해야 한다.
- 클래스의 멤버 변수 초기화
- 아래 코드에서 오버로딩을 빼면 멤버 변수 초기화 예시
- 오버로딩
- 같은 클래스에 매개변수를 다르게 하여 멤버 변수를 초기화할 수 있다.
- 포인터 메모리 할당
class Marine() {
    int hp;               //클래스에서 변수 선언만 하고 초기화 안해줌
  int coord_x, coord_y; //생성자에서 변수 초기화

    Marine(); //매개변수 없는 생성자
    Marine(int x, int y); //매개변수 있는 생성
};

Marine::Marine() {
  hp = 50;
}

Marine::Marine(int x, int y) {
  coord_x = x;
  coord_y = y;
}
복사 생성자
Photon_Cannon::Photon_Cannon(const Photon_Cannon& pc) {
  std::cout << "복사 생성자 호출 !" << std::endl;
  hp = pc.hp;
  shield = pc.shield;
  coord_x = pc.coord_x;
  coord_y = pc.coord_y;
  damage = pc.damage;
}
다른 Photon_Cannon의 객체인 pc를 상수 레퍼런스로 받는다.
이때 a는 const(상수)로 받기 때문에 복사 생성자 내부에서 a 변경 불가능
즉 변수들을 변경은 불가능, 복사는 가능 hp = pc.hp;
❓ 왜 복사 생성자가 필요한가?
//위의 코드와 연결
Photon_Cannon pc1(3, 3); //생성자 호출
Photon_Cannon pc2(pc1); // 복사 생성자 호출
Photon_Cannon pc3 = pc2; //이렇게도 복사 생성자 호출 가능
객체를 복사하는 경우 보통은 얕은 복사를 하게 됨 → 포인터 멤버 변수가 동일한 메모리 공간을 가리키게 됨 → 하나를 수정하면 다른 객체 변수도 같이 수정됨
그러므로 깊은 복사를 하여 개별적으로 사용하는 것이 좋음
깊은 복사를 위해 복사 생성자를 사용
초기화 리스트
//원래 초기화 방
Marine::Marine() {
  hp = 50;
  coord_x = coord_y = 0;
  damage = 5;
  is_dead = false;
}

//초기화 리스트 사용
Marine::Marine(int x, int y)
    : coord_x(x), coord_y(y), hp(50), damage(5), is_dead(false) {}
초기화 리스트 : 생성과 초기화를 동시에 하게 됨
//원래
int a;
a = 10;

//초기화 리스트 방법
int a = 10;
stactic 변수
//static 멤버 변수, 선언과 동시에 자동으로 0으로 초기화됨
class Marine {
  static int total_marine_num;

//초기화하고 싶다면 const static 사용
class Marine {
  const static int x = 0;
🔼 클래스 안에서 선언
특징 : 프로그램이 시작될 때 생성되고 프로그램이 종료될 때 소멸
함수 분석
// static 함수 사용
#include <iostream>

class Marine {
  static int total_marine_num;
  const static int i = 0;

  int hp;                // 마린 체력
  int coord_x, coord_y;  // 마린 위치
  bool is_dead;

  const int default_damage;  // 기본 공격력

 public:
  Marine();              // 기본 생성자
  Marine(int x, int y);  // x, y 좌표에 마린 생성
  Marine(int x, int y, int default_damage);

  int attack();                       // 데미지를 리턴한다.
  void be_attacked(int damage_earn);  // 입는 데미지
  void move(int x, int y);            // 새로운 위치

  void show_status();  // 상태를 보여준다.
  static void show_total_marine();
  ~Marine() { total_marine_num--; }
};
int Marine::total_marine_num = 0;
void Marine::show_total_marine() {
  std::cout << "전체 마린 수 : " << total_marine_num << std::endl;
}
Marine::Marine()
    : hp(50), coord_x(0), coord_y(0), default_damage(5), is_dead(false) {
  total_marine_num++;
}

Marine::Marine(int x, int y)
    : coord_x(x), coord_y(y), hp(50), default_damage(5), is_dead(false) {
  total_marine_num++;
}

Marine::Marine(int x, int y, int default_damage)
    : coord_x(x),
      coord_y(y),
      hp(50),
      default_damage(default_damage),
      is_dead(false) {
  total_marine_num++;
}

void Marine::move(int x, int y) {
  coord_x = x;
  coord_y = y;
}
int Marine::attack() { return default_damage; }
void Marine::be_attacked(int damage_earn) {
  hp -= damage_earn;
  if (hp <= 0) is_dead = true;
}
void Marine::show_status() {
  std::cout << " *** Marine *** " << std::endl;
  std::cout << " Location : ( " << coord_x << " , " << coord_y << " ) "
            << std::endl;
  std::cout << " HP : " << hp << std::endl;
  std::cout << " 현재 총 마린 수 : " << total_marine_num << std::endl;
}

void create_marine() {
  Marine marine3(10, 10, 4);
  Marine::show_total_marine();
}
int main() {
  Marine marine1(2, 3, 5);
  Marine::show_total_marine();

  Marine marine2(3, 5, 10);
  Marine::show_total_marine();

  create_marine();

  std::cout << std::endl << "마린 1 이 마린 2 를 공격! " << std::endl;
  marine2.be_attacked(marine1.attack());

  marine1.show_status();
  marine2.show_status();
}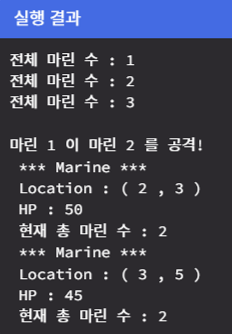
create_marine(); 으로 전체 마린 수가 3개가 되었지만 'marine3'은 create_marine()의 지역변수임.
그러므로 함수가 끝나서 marine3 객체는 소멸하게 됨.
즉 , create_marine() 실행 → 생성자 - marine3 변수 선언 → total_marine_num ++ 돼서 3개 → 소멸자 → total_marine_num - - 돼서 다시 2개
레퍼런스를 리턴하는 함수
#include <iostream>

class A {
  int x;

 public:
  A(int c) : x(c) {} //초기화 리스트를 사용한 A클래스의 int x를 c로 초기화

  int& access_x() { return x; } //이 함수를 부르면 x를 리턴
  int get_x() { return x; } // 위와 동일
  void show_x() { std::cout << x << std::endl; } //x값 출력
};

int main() {
  A a(5);  //초기화 리스트에 의해 x=5
  a.show_x(); //x값 5출력

  int& c = a.access_x(); //참조에 의해 c는 x의 또 다른 별명임
  c = 4; //c가 4가 됨과 동시에 x도 4임 (x = c = 4)
  a.show_x(); //x는 4출력

  int d = a.access_x(); //d변수를 a.access_x()로 선언함  >> int a = 5; 하고 다음줄에 a = 3; 과 똑같음
  d = 3; //d 변수값 3으로 바뀜
  a.show_x(); //x는 변화 없으므로 4출력

  int f = a.get_x(); //위와 마찬가지로 변수 f를 a.get_x()로 선언
  f = 1; //변수값 변경
  a.show_x(); //x는 변화X, 4출
}
추가
a.access_x() = 3; //잘 작동함 a.x = 3;이란 뜻
//access_x()가 & 참조변수라서 x의 값 변경이 가능함

//그러나
a.get_x() = 3; //모순
explicit 한정자
class MyClass {
public:
  MyClass(int x) : data(x) {}
  int data;
};

void myFunc(MyClass obj) {
  // ...
}

int main() {
  myFunc(42); // MyClass(int x) 생성자에 의해 42를 인수로 전달
  return 0;
}
🔼 이게 일반적인 코드
class MyClass {
public:
  explicit MyClass(int x) : data(x) {} // 생성자에 explicit 추가
  int data;
};

void myFunc(MyClass obj) {
  // ...
}

int main() {
  // myFunc(42); // 컴파일 오류: 암시적 변환 금지
  myFunc(MyClass(42)); // 명시적인 객체 생성과 함께 함수 호출
  return 0;
}
🔼 explicit 한정자 추가
- myFunc(42); 이런식으로 값 변경 못함 (암시적 변환 허용)
- myFunc(MyClass(42)); 좀 더 안정성을 높이는 방식으로 함수에 전달하여 값 변경은 가능
mutable 한정자
>> const가 붙은 상수 변수의 값을 변경할 수 있도록 해줌
class MyClass {
public:
  void setValue(int x) const {
    mutableValue = x; // const 멤버 함수에서도 mutable 변수 변경 가능
  }

  int getValue() const {
    return value;
  }

private:
  int value;
  mutable int mutableValue; // mutable 변수 선언
};
int x는 const가 붙은 상수화 변수지만 private에서 mutable 한정자를 사용하여 mutableValue 멤버 변수를 선언하였으므로 setValue에서도 x 변경 가능
❓ 왜 mutable이 필요한가?
상수화된 멤버 변수 중에서도 변경할 필요가 있는 변수를 허용하기 위해서 사용됨
ex) 캐시 메모리를 사용할 때 , 캐시를 갱신해야하는 경우가 생김 → 그러나 객체의 불변성, 캡슐화를 해칠 수도 있으므로 적절히 사용해야한다.
=> 우리가 많이 사용할 일은 없겠지만 개념은 알아두자!
'C++' 카테고리의 다른 글
| [C++] 파일 입출력 (0) | 2024.03.15 |
|---|---|
| [C++] 한 줄 입력 받기, 공백 포함 입력 받기 | getline() (0) | 2023.08.09 |
| [C++] 상속, proteced (0) | 2023.04.01 |
| [c++] 참조(레퍼런스), 포인터 개념 정리 (0) | 2023.03.31 |
| [c++] 보안 취약 에러 | scanf, strcpy (0) | 2023.03.29 |